
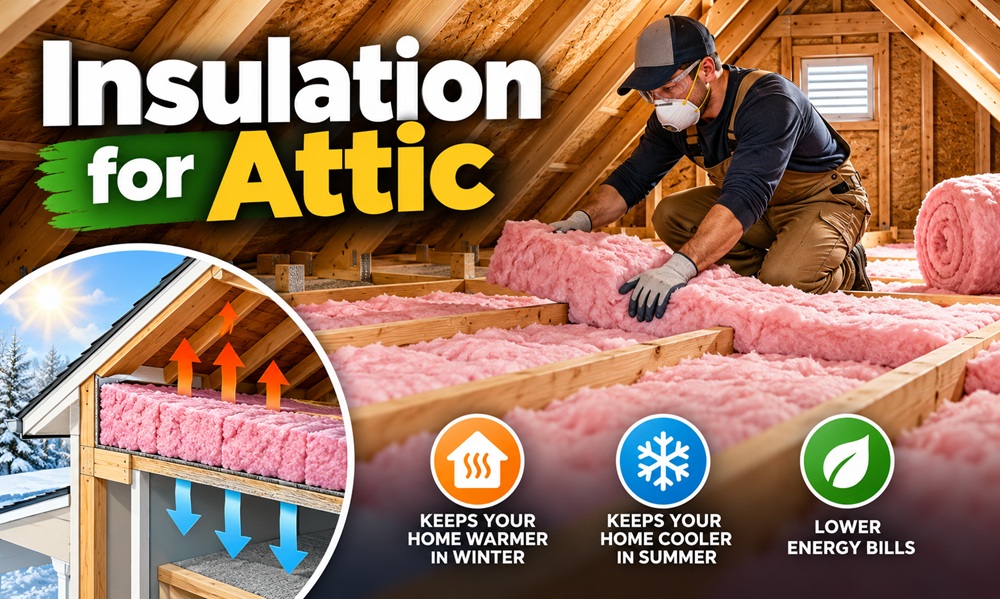
For most homes, the right insulation for an attic is blown-in fiberglass or cellulose spread across the attic floor, or batts if the joist cavities are clear and easy to fit. If the roof itself has to be insulated, because the attic is finished or holds ductwork, spray foam or rigid foam board usually makes more sense. Your climate, the way the attic is built, and what’s already up there will decide which one fits.
Heat rises, and the attic is where a lot of it escapes. In winter, warm air leaks through the ceiling below and disappears. In summer, the roof bakes the attic and that heat settles back down into your bedrooms. Good attic insulation slows both, which is why it’s often the first upgrade an energy auditor points to.
Decide where the insulation belongs
Before picking a material, work out which surface is the thermal boundary of your home. There are two common setups.
In a vented, unfinished attic, the insulation goes on the attic floor, between and over the ceiling joists. The attic itself is treated as outdoor space. It gets hot and cold with the weather, and roof and soffit vents let air move through to carry away moisture.
In an unvented or conditioned attic, the insulation sits against the underside of the roof deck, along the rafters. You’ll see this when an HVAC unit or ductwork lives in the attic, or when the space has been turned into a room. It’s a more technical build, and it usually calls for spray foam or a carefully designed assembly.
Mixing the two approaches causes trouble. Insulating both the floor and the rafters of a vented attic can trap moisture where it shouldn’t be.
Common types of attic insulation
Fiberglass batts and rolls
These are the pink or yellow blankets most people picture. They’re inexpensive and friendly to DIY work, and they fit well when joists are evenly spaced and the cavities are free of obstructions. Their weak point is fit. Gaps at the edges, compressed sections, and rough cuts around wiring all cut into performance, so a careful installation matters more than the label on the package.
Blown-in fiberglass
Loose fiberglass is blown across the attic floor with a machine, which lets it flow around pipes, wires, and framing that would make batts awkward. It’s a popular choice for adding depth to an attic that already has some insulation, and it covers irregular spaces evenly.
Blown-in cellulose
Cellulose is made mostly from recycled paper treated for fire resistance. It packs more densely than loose fiberglass and does a good job filling small gaps. It can settle over time, so installers often put down extra depth to account for that. It also holds moisture if the roof leaks, so any leak needs to be fixed first.
Spray foam
Spray foam expands as it’s applied and seals small cracks while it insulates. Open cell foam is lighter and softer, and it costs less. Closed cell foam is denser, delivers a higher R-value per inch, and resists moisture better, but it costs more. Foam makes the most sense on the roofline of an unvented attic, and it’s generally a professional job.
Mineral wool and rigid foam board
Mineral wool batts handle heat and moisture well and don’t burn easily, which suits spots near flues or in damp climates. Rigid foam boards are handy for specific problem areas such as attic hatches, kneewalls, and rafter bays where there’s little room for anything thicker.
How much insulation does an attic need
Insulation is rated by R-value, which measures resistance to heat flow. A higher number means better resistance. The level you need depends on your climate zone, and the U.S. Department of Energy publishes recommendations by region. Your local building code may set a minimum as well, so it’s worth checking both before you buy.
You can do a quick visual check without any special tools. If the tops of your ceiling joists are visible, you probably have room to add more. If the insulation looks flattened, damp, or patchy, the real performance is likely lower than what was installed originally.
Older homes often have far less than current recommendations call for, and adding to what’s there is usually cheaper than starting over. Depth matters, but so does evenness. A thick layer with bare patches near the eaves won’t perform like a uniform one.
Seal air leaks before adding insulation
Insulation slows heat moving through material. It does very little against air moving through gaps. If warm indoor air is escaping around the attic hatch, plumbing stacks, wire penetrations, and the tops of interior walls, new insulation laid on top won’t solve the problem and can hide it.
Spend an afternoon looking for those gaps and closing them with caulk, expanding foam, or fire-rated sealant where heat sources are involved. Cover and seal the attic hatch with weatherstripping and a rigid insulated cap. Gaps around recessed lights and chimneys need special care, since insulation has to stay a safe distance from certain fixtures and flues. Check the fixture labeling and your local code before covering anything.
Keep the airflow open
Vented attics depend on air entering through the soffits and leaving near the ridge. New insulation pushed into the eaves can block that path. Rafter baffles, the plastic or foam channels installed at the roof edge, keep a clear lane for airflow no matter how deep the insulation gets.
Blocked ventilation can contribute to moisture buildup, which affects both the insulation and the roof structure. If you notice musty smells, stained sheathing, or frost on the underside of the roof in winter, have the attic assessed before adding anything.
Mistakes that quietly waste the money
A few errors show up again and again in attics. Compressing batts to squeeze them under a low roof reduces their effectiveness. Covering the soffit vents with insulation cuts off airflow. Leaving the attic hatch bare turns it into a hole in your ceiling. Stacking new insulation over damp or damaged material hides a problem rather than fixing it.
Another slip is treating the attic floor like a storage shelf after the job is done. Boxes pressed into loose fill flatten it, and foot traffic leaves bare spots. If you need storage up there, raise a platform above the insulation level instead of packing things into it.
Doing it yourself or hiring a pro
Rolling out batts or renting a blower for loose fill is a realistic weekend job for many homeowners who are comfortable in tight spaces. Spray foam is different. It involves specialized equipment and chemical handling, and mistakes are expensive to undo.
Whichever route you take, protect yourself. Wear long sleeves, gloves, eye protection, and a properly rated respirator, since insulation fibers irritate skin and lungs. Step only on joists, not on the drywall between them. Keep an eye out for old knob and tube wiring, which should never be buried in insulation without an electrician’s approval.
One more caution. If the attic contains loose, pebble-like granules, they may be vermiculite, and some vermiculite insulation has been linked to asbestos contamination. Leave it undisturbed and have it tested by a qualified professional before doing any work nearby.
Making the call
If your attic floor is open and unfinished, start with air sealing and then add blown-in insulation to a level that matches your climate zone. If you’re dealing with a finished attic or a roofline that has to carry the insulation, get a professional to evaluate foam options. Either way, a walk through the attic with a flashlight will tell you more than any product comparison, because the condition of what’s already there shapes every other choice.
